How to Fold a Tiny Paper Pope Hat
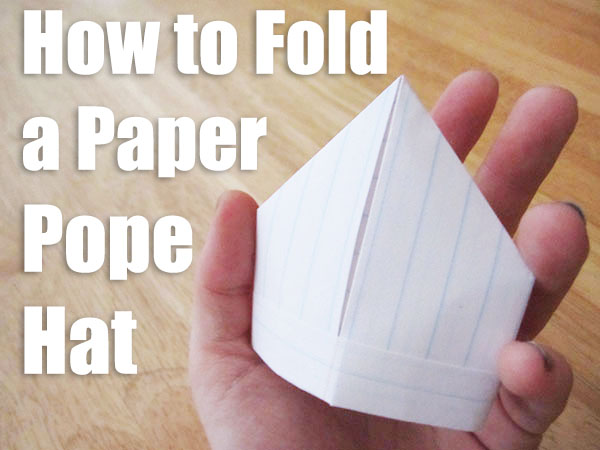
Gearing up for a visit from the pope? Get your home ready for the papal visitation with a tiny origami version of the pope’s tall, pointed hat: the mitre. The mitre (also spelled miter) is a formal headdress for high offices of the Roman Catholic Church, as well as some protestant sects. Bishops, cardinals and the pope are traditional wearers of the high pointy hat. Mitres can be plain but are more often ornate, with embroidery, beadwork, and even jewels adorning them. Fold a classic mitre with these simple instructions to celebrate Pope Francis’ visit!
Pro-tip: As you work, run your fingernail over each fold to sharpen each crease once you know it is in the right place. This makes the folds sharp and gives the finished projects a crisp, professional look.
Start with a rectangular piece of paper. That’s right, a rectangle, not a square! While most origami is folded from squares of colorful paper, the mitre is folded from a rectangle. For this tutorial we used a piece of lined paper to clearly show the folds of the project, but you can use any colors you like. Traditionally, the pope’s mitre is a combination of white and gold.

Fold your paper to create centered creases. First, fold your paper in half width-wise, then open and fold your paper in half length-wise. By making these folds, you’ll be able to center your work and won’t end up with a lopsided pontiff-topper.

Form the point of the hat. With the paper folded in half width-wise, fold the two top corners down to meet along the lengthwise center line, just like folding a paper airplane. Your paper is now a folded triangle with two long, rectangular flaps at the bottom.

Form one side of the brim. Fold the top flap (and only the top flap) up so that the edge meets the bottom of the folded triangle and crease. Then fold it up again, this time making the crease at the bottom of the triangle. Flip over.

Shape the body of the hat. Fold the sides of the mitre in to meet the original center crease. This is the moment when your folded hat really begins to take shape! Check to make sure your folds are sharp and firm before proceeding.

Finish the brim. Now fold the remaining flap as you did the first: fold up to meet the edge, crease, fold over again, and crease. Unfold the flap – you’re almost done!

To finish, do something you never, ever do to a book: dog-ear each corner. Once the corners are folded in, carefully tuck the dog-eared corners into the brim of your bishop’s mitre. Press firmly in place, sharpen the creases, and you’re all done!

Display your tiny pope hats wherever you like – tiny hats on pencil tops, small hats on festive garlands, colorful hats on Christmas lights, even large hats for your own head!