Make Your Own Eye Mask (for Naps that are Lovely, Dark, and Deep)
Though sunbeams to my windows creep
The benefits of rest I reap
I will remain quite fast asleep,
I will remain quite fast asleep.
– Robert Frost, if he had had a good eye mask
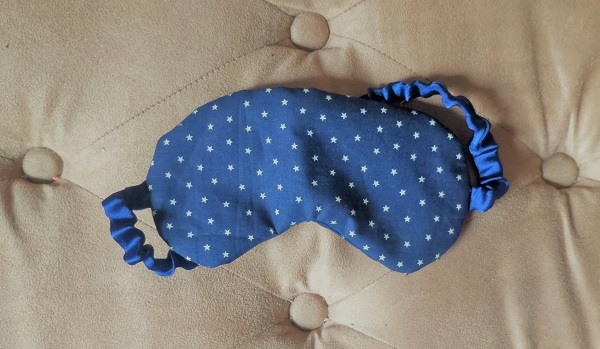
It’s terribly difficult to get a good night’s rest with streetlights peeking in on you, or to sleep late when sun shines in your window. But with an elegant eye mask, you’ll block those rays and appreciate all the quiet and calm of a deep, dark, snow-filled wood any time you want to catch a little shut eye. They best part? You can make this project with a very small amount of fabric, so if you sew regularly, this is a wonderful option for using up your scraps!

First, gather your materials:
- Fabric, 1 square foot (Pick something that feels nice on your skin)
- Felt, 1 sheet
- Elastic, 18 inches
- Ribbon, 24 inches (Pick ribbon at least twice as wide as your elastic)
- Eyemask template
- Sharp scissors
- Needle and thread
- Pins
- Safety pin

Cut out your eye mask pieces
First, print and cut out your eye mask template. Trace your template in light pencil or chalk onto your fabric and your felt – trace it once onto the felt and twice onto your fabric. Cut each piece out of your fabric and felt, trim for evenness, and set aside.

Cut elastic and ribbon casing
For the average adult, the elastic will need to reach (stretched, but comfortable) from temple to temple. Measure your elastic on yourself to be sure, and cut accordingly. Your ribbon should be at least 4 inches longer than your temple-to-temple measurement.

Stitch ribbon casing and thread elastic
Fold your ribbon lengthwise and pin it together. Carefully sew along the edges of the ribbon, forming a tube. Remove the pins as you go, and you’ll have a silky ribbon tube that’s ready to be turned inside out! Affix the safety pin to one end of your ribbon tube and carefully push the pin into the tube itself. Pushing the pin a little bit at a time, eventually it will come out the other end. Pull the end through to reveal your finished right side out ribbon tube. Now affix the safety pin to one end of your elastic, and push it through the tube in the same way.

Pro tip: Pin one end of the elastic to the ribbon tube as you push the other end through – this way you won’t lose the elastic inside the tube and have to start over. When your elastic is threaded all the way through, stitch the tube to the elastic so it can be secure without a pin (in the sewing world, this is called tacking).

Pin and stitch your eye mask
Imagine your eye mask pieces as a sandwich, and assemble them as so from the bottom up:
- Wrong side down fabric
- Elastic band, pinned in place
- Wrong side up fabric
- Felt

Pin all the pieces in place and carefully stitch around, leaving ¼ inch seam allowance around and a three inch gap in stitching at the top. Trim the seam allowance of the felt to ⅛ inch and remove all your pins.
Pro tip: Back tacking, or sewing over one part of your seam multiple times, builds up your stitching and makes your seams stronger. Reinforce the areas where you have sewn the elastic band on with a little back tacking to ensure that they won’t tear free mid-nap!

Turn your eye mask and close your seam
Turn the eye mask right side out, and check for any raw edges or loose seams (there shouldn’t be any, but it’s always good to check!). Fold the edges of the space you left for turning in and hand stitch them together. Wear your eye mask and enjoy a good night’s sleep (or a lovely mid-afternoon nap)!