Bake What You Wish and None Dare Resist: DIY Smaug-Inspired Oven Mitts
It does not do to leave a live dragon out of your kitchen calculations, if you live near him.
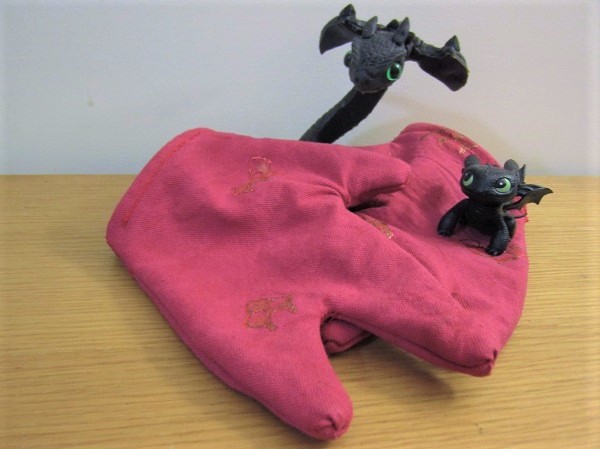
Cakes, breads, cookies and roasts – all the things a delicious dragons hoard boasts! Embrace your inner domestic dragon with your own pair of Smaug-inspired oven mitts designed to protect your hands like tenfold shields against the fires of stove and oven.

Gather your materials:
– Sturdy canvas – This example is the deep red of Smaug’s scaly hide, but you can use any color you like.
– Cotton towel – This will be the insulation for your oven mitt.
– Matching thread – You’ll use this for the lion share (or rather DRAGON SHARE) of the sewing.
– Contrasting thread/embroidery floss – You’ll use this for decoration, so choose a color that pairs well with your canvas
– Sewing pins and needles
– Paper and pencil
– Chalk or permanent marker
– Fabric paint
– Sewing machine (optional)
– Felt in contrasting color (optional, for details)

First things first, trace your hand onto your paper. Lay your hand out with your middle and ring finger spread apart and trace. Once you’ve traced your hand, draw a simple outline around the tracing in the shape of a dragon hand with three claws. This will be the line you cut on, so make leave at least ¾ of an inch of space between the outline and the traced line.

Pro-tip: Leave the wrist extra-wide to make it easy to slip your oven mitt on and off!

Cut out your stencil and trace it onto your canvas and onto your towel – twice with the thumb facing left, and twice with the thumb facing right on each. Cut out your fabric pieces and match them up – one towel piece to one canvas piece – and pin in place. Make sure the ‘right side’ of your canvas is facing out!


Add some scales! First draw your scales onto the canvas – small interlocking tear drops are a perfect shape. Then you can use fabric paint, needle and thread, or even felt to add detail to your mitts. This sample uses a blend of metallic bronze and red fabric paint, but you can choose any color you wish!
Stitch your mitts together! With towel facing out, stitch the edges together. Leave a quarter inch of seam allowance (space between your stitches and the edge of the fabric) all the way around. For an added layer of stitch security, stitch all the way around your mitts again to reinforce the seams.

Turn and decorate! Turn your mitts canvas-side out, taking extra time to turn the claws carefully. To poke the point all the way out and truly make your claws like spears, try using a pen (with the cap still on!) or a knitting needle to push the tip of the claw out from the inside of the mitt. This can be tricky at first, but is well worth the effort for the finished look!
Decorate with any supplies you like (fabric paint, sequins, etc) on the back of each mitt, but use only cotton or wool fibers (like yarn or embroidery floss) on the palm-side of each mitt. You might even want to include one conspicuously missing scale on the underside for those miserable tubthumping lakemen to take advantage of.
Add the ribbon loop. Cut 3 inches of ribbon, fold over, and sew the ends together. Stitch these ends to the inside of the cuff of each mitt to make them easy to hang up and display when you’re not busy baking up minced hobbit pies for your troll guests or seed cakes for a little second breakfast in the dining room by the open window.

Now go, and bake! After all, if more of us valued food and cheer and song above hoarded gold, it would be a merrier (and tastier) world.