How-To Tuesday: DIY Bookish Bridal Guestbook
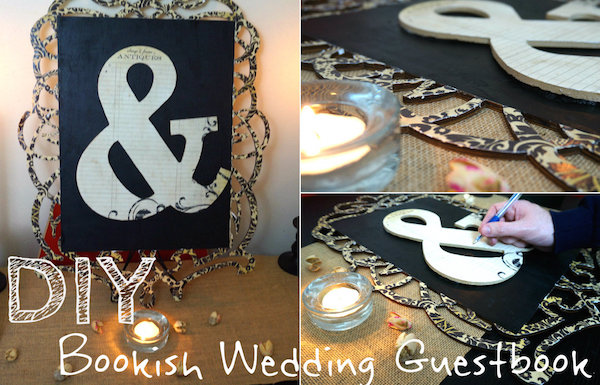
The most beautiful thing that all modern weddings have in common? Every couple has its own style. Some are into color coordinated soirees, others want their big day to be a destination wedding, and others simply just want to put their touch on a traditional ceremony. So for those book loving couples, we have the perfect way to put your personal touch on your wedding. Instead of literally having a guestbook at your wedding, design this typography inspired guestbook that you can later hang up in your home as a constant reminder of your beautiful day. This project, while not overly challenging, does take a fair bit of work, so be sure to plan to make this well in advance of your wedding.

What You’ll Need
4-6 pieces of scrapbook paper, trimmed and cut in half
Chalkboard Paint
Two paint brushes
1 wooden laser cut flat frame, like this.
1 wooden “&” sign
Mod podge
Hot glue and hot glue gun
X-acto knife
Scissors
Painters tape

Directions:
1. Before you begin frame the center of the wooden frame with painter’s tape to protect the decorative edges. You could use a ruler to help make sure that the lines are perfectly straight.
2. Paint the framed center section in chalkboard paint. Keep in mind, you will need at least two coats and allow the board to drying completely in between coats. Set aside.
3. While they are drying, take your “&” and lay it down flat, painting a thin coat of Mod Podge on it.
4. Secure the scrapbook paper on top of the “&” and smooth out the paper, getting rid of folds and bubbles. Repeat the process with the second letter. Allow time to dry.
5. Using scissors and an X-acto knife, cut the paper around the edges of the “&.”
6. Now that your chalkboard paint is dry, take your scrapbook paper and outline the black center of it with the straight edges of the paper.
7. Brush a thin coat of Mod podge onto the wood, and set the paper down decorative side facing up. Continue until all of the wedges are covered, taking care to follow along the pattern of the paper.
8. Smooth out the paper, getting rid of folds and bubbles. Allow to dry.
9. Using scissors and an X-acto knife, cut the paper around the edges of the wooden frame.
10. Center the “&” in the middle of the wood frame and secure it using hot glue. NOTE: The hot glue made be visible from the sides once dry. Take care to paint the dried hot glue with the chalkboard paint.

Lauren Gordon
Lauren Gordon, a Philadelphia native, graduated from Temple University’s School of Communications and Theater in 2010 with a focus in Magazine Journalism. Immediately after graduation, Lauren became the Assistant Editor of Philadelphia RowHome Magazine and since has gone on to be the Senior Editor, Entertain and holidays at The Daily Meal. Lauren is a voracious bookworm with a special talent for useless crafts. She also loves to bake and cook, and to write about all of it.